honeywell 6000 thermostat installation manual
Honeywell 6000 Thermostat Installation Manual: A Comprehensive Guide
This manual details the installation and operation of the Honeywell FocusPro 6000 Series programmable thermostat, ensuring efficient HVAC system control and optimal comfort.
The Honeywell FocusPro 6000 Series represents a significant advancement in home climate control, offering programmable functionality and user-friendly operation. This thermostat is designed for compatibility with a wide range of heating and cooling systems, including conventional and heat pump setups. Its digital interface provides clear temperature displays and intuitive menu navigation.
This series prioritizes energy efficiency, allowing homeowners to create customized schedules that optimize comfort while minimizing energy consumption. Proper installation, as detailed in this manual, is crucial for ensuring accurate temperature readings and reliable system performance. The FocusPro 6000 aims to deliver consistent comfort and cost savings. Understanding the thermostat’s features and capabilities will empower you to maximize its benefits.
Understanding the Thermostat Components
The Honeywell FocusPro 6000 thermostat comprises several key components essential for its operation. These include the thermostat body, housing the digital display and control buttons, and the wallplate, which facilitates mounting and electrical connections. The terminal block on the wallplate is where the low-voltage wiring from your HVAC system connects – specifically, the R, W, Y, and G terminals.
The display provides temperature readings, setpoints, and system status information. Buttons allow for temperature adjustments, programming schedules, and navigating the menu. Jumpers are present on the wallplate for specific system configurations, and may need removal for 2-transformer systems. Familiarizing yourself with these components before installation will streamline the process and ensure a successful setup.
Safety Precautions Before Installation
Prior to installing your Honeywell FocusPro 6000 thermostat, crucial safety precautions must be observed. Always disconnect power to your HVAC system at the breaker box to prevent electrical shock. Verify the power is off using a non-contact voltage tester. Incorrect wiring can damage your equipment or create a fire hazard, so proceed with caution.
If you are uncomfortable working with electrical wiring, consult a qualified HVAC technician; Ensure the thermostat location isn’t exposed to direct sunlight, drafts, or excessive moisture. Use only 18- to 22-gauge thermostat wire; shielded cable isn’t necessary. Carefully read and understand all instructions before beginning the installation process.
Installation Process
The installation involves securing the wallplate, carefully connecting the thermostat wires, mounting the thermostat itself, and then proceeding with system configuration and testing.
Wallplate Installation
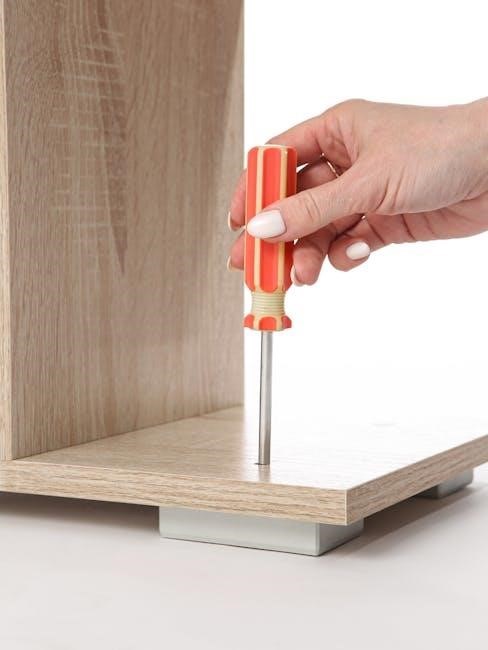
Begin by carefully removing the wallplate from the Honeywell FocusPro 6000 thermostat. Ensure power is disconnected at the breaker before proceeding with any wiring. Position the wallplate on the desired location, utilizing a level to guarantee a straight installation.
Mark the screw holes accurately, then drill appropriately sized holes if necessary, using wall anchors for drywall installations. Securely attach the wallplate to the wall using the provided screws.
Double-check the wallplate’s stability before connecting any wires. Proper wallplate mounting is crucial for a stable and reliable thermostat installation, preventing future issues with connectivity or physical security. Follow the instructions for mounting carefully.
Wiring Terminal Designations (R, W, Y, G)
Understanding the terminal designations is vital for correct wiring. ‘R’ signifies the 24VAC power source, providing energy to the thermostat. ‘W’ controls the heating system, activating when heat is needed. ‘Y’ activates the cooling system, initiating the air conditioning. ‘G’ energizes the blower fan, circulating air throughout the system.
Accurate connection to these terminals ensures proper system operation. Incorrect wiring can lead to malfunctions or damage to your HVAC equipment. Refer to page 14 of the manual for detailed wiring diagrams specific to your system type.
Always double-check connections before restoring power, verifying each wire is securely fastened to its corresponding terminal.
Using 18- to 22-Gauge Thermostat Wire
Employing the correct gauge thermostat wire is crucial for reliable performance. The Honeywell 6000 thermostat is designed for use with 18- to 22-gauge thermostat wire, ensuring sufficient conductivity for control signals. Utilizing wire outside this range may result in inaccurate readings or system malfunctions.
Shielded cable is not required for standard installations, simplifying the wiring process. Ensure the wire is in good condition, free from breaks or damage, to maintain a stable connection. Proper wire gauge minimizes voltage drop, contributing to consistent and accurate temperature control.
Always adhere to local electrical codes when installing or replacing thermostat wiring.
Wiring Conventional Heating and Cooling Systems
For conventional systems, accurate wiring to the R, W, Y, and G terminals is paramount. The ‘R’ terminal receives 24VAC power, ‘W’ activates heating, ‘Y’ controls cooling, and ‘G’ energizes the fan. Consult page 14 of the installation manual for detailed wiring diagrams specific to your system configuration.
Ensure proper connections to avoid system damage or incorrect operation; Double-check all wire connections before restoring power. If a ‘C’ (common) wire is not present, the system may still function, but a ‘C’ wire is recommended for optimal performance and compatibility with advanced features.
Verify the wiring matches your HVAC system’s specifications.
Wiring Heat Pump Systems
Wiring heat pump systems requires careful attention to the ‘O’ or ‘B’ terminal, which controls the reversing valve. The installer setup must correctly designate this terminal – ‘O’ for cooling initiated by the thermostat and ‘B’ for heating. Incorrect selection will result in reversed heating and cooling operation.
Standard heat pump wiring utilizes R, Y, G, and either O or B terminals. Some systems may also require a ‘C’ (common) wire for consistent power. Refer to the detailed wiring diagrams on page 14 of the manual for specific configurations.
Always verify the system type and wiring before energizing the thermostat.
Removing Jumpers for 2-Transformer Systems
For systems utilizing two separate transformers, it’s crucial to remove the jumper between the Rh and Rc terminals on the thermostat’s wallplate. This prevents potential damage to the thermostat and ensures proper system operation. Failure to remove this jumper can cause a short circuit and malfunction.
The jumper is typically present to simplify wiring in single-transformer systems. However, with two transformers, each transformer provides power to a separate set of terminals – Rh (heating transformer) and Rc (cooling transformer). Maintaining the jumper creates a direct connection between these powered terminals.
Carefully disconnect the jumper wire before proceeding with the final wiring connections.
Optional 24VAC Common Connection
Some advanced HVAC systems may require a 24VAC common (C) wire connection to the thermostat for consistent power and to support all features, particularly Wi-Fi connectivity and advanced functionalities. This connection provides a dedicated return path for the 24VAC power supply.
If your system doesn’t currently have a C-wire, you might need to run a new wire from the furnace or air handler. Alternatively, a C-wire adapter may be used, though compatibility should be verified. The adapter draws power from other wires, effectively creating a common connection.
Consult your HVAC system’s documentation or a qualified technician to determine if a C-wire is necessary for your specific setup.
Thermostat Mounting
Securely attach the thermostat to the previously installed wallplate, ensuring a snug fit and proper alignment for reliable operation and aesthetic integration.
Attaching the Thermostat to the Wallplate
Carefully align the thermostat body with the wallplate, ensuring the terminals and wiring are correctly positioned and free from obstruction. Gently push the thermostat onto the wallplate until it clicks securely into place; a firm, even pressure is recommended.
Verify the thermostat is firmly mounted and does not exhibit any wobble or looseness, as this could disrupt electrical connections and affect performance. If the thermostat doesn’t snap on easily, double-check the wiring and alignment.
Once mounted, visually inspect the connections to confirm all wires remain securely fastened to their respective terminals. A properly attached thermostat will sit flush against the wall, providing a clean and professional appearance. Avoid forcing the thermostat onto the wallplate, as this could damage the unit or wiring.
Power Supply and Disconnect Means
Ensure a suitable power supply is available for the Honeywell 6000 thermostat, typically 24VAC. It’s crucial to provide a readily accessible disconnect means, such as a circuit breaker or switch, to completely de-energize the system for maintenance or emergencies.
Overload protection is also essential; verify the circuit supplying the thermostat and HVAC system is appropriately sized and protected by a fuse or circuit breaker. Before commencing any wiring or installation work, always disconnect power to the HVAC system at the breaker panel.
Follow all local electrical codes and regulations during installation. Improper wiring or lack of proper disconnect means can create a safety hazard and void the warranty.
Configuration and Setup
Proper configuration is vital for optimal performance; this section guides you through essential setup procedures, including changeover valve settings and system testing.
Installer Setup: Changeover Valve (O or B)
During the installer setup process, a crucial step involves configuring the changeover valve setting. This setting determines whether the thermostat utilizes terminal ‘O’ or ‘B’ for reversing valve control, essential for heat pump systems. Incorrect configuration will result in improper heating or cooling operation.
Access the installer setup menu via the thermostat interface. Navigate to the system configuration options and locate the changeover valve setting. If your heat pump system utilizes a ‘O’ terminal for reversing valve control, select ‘O’. Conversely, if your system employs a ‘B’ terminal, select ‘B’.
Carefully review your HVAC system’s wiring diagram to confirm the correct terminal designation before making a selection. An incorrect setting can lead to inefficient operation or even damage to your equipment. After selecting the appropriate terminal, save the changes and exit the installer setup menu.
Installer System Test Procedure
The Installer System Test is a vital diagnostic procedure to verify correct wiring and operational functionality after installation. To initiate, press and hold designated buttons on the thermostat until the display changes, signaling entry into test mode. Subsequently, use the appropriate buttons to cycle through heating, cooling, and fan-only modes.
Observe the HVAC system’s response during each test. Confirm that the heating system activates during the heating test, the cooling system engages during the cooling test, and the fan operates correctly in fan-only mode. Use the ‘NEXT’ button to proceed through each test stage.
If any discrepancies are observed, immediately address the wiring or configuration before completing the test. Upon successful completion of all tests, press ‘DONE’ to exit the system test mode and return to normal operation.
Activating/Deactivating the System During Testing
During the Installer System Test, activating or deactivating each HVAC function is crucial for accurate assessment. Within the test menu, a dedicated button, often indicated by a power symbol or similar icon, controls system activation. Pressing this button initiates the selected mode – heating, cooling, or fan – allowing observation of the system’s response.
To deactivate a running function, simply press the same button again. This ensures a controlled environment for testing each component independently. Observe carefully for proper start-up and shut-down sequences. Confirm that the system responds promptly and reliably to each activation/deactivation command.
Properly utilizing this function is essential for identifying wiring errors or configuration issues before finalizing the installation.
Navigating the System Test Menu
Accessing the System Test menu is initiated by simultaneously pressing and holding specific buttons on the thermostat until the display changes, indicating entry into test mode. Typically, the “Up” and “Down” buttons are used for this purpose. Once inside, utilize the “NEXT” button to cycle through each function – heating, cooling, and fan – individually.
The display will clearly indicate the currently selected function. Pay close attention to the on-screen prompts and instructions. The menu is designed for intuitive operation, allowing installers to quickly verify the functionality of each system component. Use the “DONE” button to exit the System Test once all functions have been verified.
Familiarity with this menu is key to efficient troubleshooting and ensuring proper installation.
Completing the System Test
After thoroughly testing each function – heating, cooling, and fan – within the System Test menu, it’s crucial to finalize the process correctly. Pressing the “DONE” button signals the completion of the test sequence and returns the thermostat to normal operating mode. Confirm that the display returns to the standard time and temperature view, indicating successful exit.

Document the results of the system test for your records. Note any discrepancies or issues encountered during testing, as this information will be valuable for troubleshooting if needed. A successful completion confirms proper wiring and configuration of the Honeywell 6000 thermostat with the HVAC system.
Double-check all connections and ensure the thermostat is securely mounted before leaving the installation site.

Operation and Maintenance
Regular checks of batteries and cleaning are vital for accurate operation; address common issues promptly and consult specifications for electrical ratings and details.
Electrical Ratings and Specifications
The Honeywell FocusPro 6000 thermostat operates on a 24VAC power source, requiring a compatible HVAC system. Its electrical ratings are crucial for safe and effective installation. Specifically, the thermostat supports 18- to 22-gauge thermostat wire, and shielded cable is generally not required for standard installations.
Power supply considerations are paramount; a disconnect means and overload protection must be provided as part of the overall system setup. The thermostat is designed to handle typical HVAC loads, but exceeding these ratings can lead to malfunction or damage. Always verify compatibility with your existing HVAC equipment before proceeding with the wiring process. Refer to detailed wiring diagrams on page 14 of the manual for specific terminal designations (R, W, Y, G) and connection instructions.
Understanding these specifications ensures a reliable and long-lasting installation.
Regular Battery Checks
Maintaining optimal performance of your Honeywell FocusPro 6000 thermostat requires consistent battery checks. While the thermostat can often operate on HVAC system power, batteries serve as a crucial backup during power outages, preserving your programmed settings and ensuring continued operation.
It’s recommended to check the batteries at least twice a year, or whenever the thermostat displays a low battery indicator. Use fresh alkaline batteries of the correct size as specified in the manual. Prompt battery replacement prevents loss of settings and potential disruptions to your heating and cooling schedule.
Regular checks contribute to accurate temperature readings and reliable system control, maximizing energy efficiency and comfort. Don’t overlook this simple maintenance step!
Thermostat Cleaning
To ensure the longevity and accurate operation of your Honeywell FocusPro 6000 thermostat, regular cleaning is essential. Dust and debris accumulation can interfere with the thermostat’s sensors and display, potentially leading to inaccurate temperature readings and operational issues.
Before cleaning, always turn off power to the HVAC system at the breaker to prevent electrical shock. Use a soft, dry cloth to gently wipe the thermostat’s exterior. Avoid using liquid cleaners, abrasive materials, or excessive moisture, as these can damage the unit.
For the display screen, a slightly dampened cloth can be used, but ensure it’s nearly dry. Consistent cleaning maintains a clear display and reliable performance, contributing to optimal comfort and energy savings.
Troubleshooting Common Issues
If you encounter problems with your Honeywell FocusPro 6000 thermostat, several quick checks can often resolve the issue. First, verify the thermostat has fresh batteries, as low battery power can cause erratic behavior. Ensure the wiring connections are secure and match the correct terminal designations (R, W, Y, G).
If the system isn’t responding, double-check the breaker hasn’t tripped. For display issues, try resetting the thermostat. If heating or cooling isn’t functioning, confirm the system mode is set correctly. Most problems can be resolved quickly and easily with these basic steps.
For persistent issues, consult the full manual or contact Honeywell customer support at 1-800-468-1502.
No Internet Connection Troubleshooting
If your Honeywell FocusPro 6000 thermostat is experiencing connectivity issues, begin by verifying your home’s Wi-Fi network is functioning correctly. Ensure the router is powered on and broadcasting a signal. Confirm the thermostat is within range of the Wi-Fi network; walls and distance can impact signal strength.
Restart both the thermostat and your router. Double-check the Wi-Fi password entered during setup is accurate. If problems persist, try forgetting the network on the thermostat and reconnecting. Ensure your router’s firmware is up-to-date.
Contact your internet service provider if the issue continues, as the problem may lie with your internet connection itself.

Additional Information
For further assistance, contact Honeywell Customer Support at 1-800-468-1502. Locate the model number and date code on the thermostat for support purposes.
Customer Support Contact Information (1-800-468-1502)
Should you encounter any difficulties during the installation or operation of your Honeywell FocusPro 6000 thermostat, Honeywell’s dedicated customer support team is readily available to provide assistance. You can reach them by calling 1-800-468-1502. Please have your thermostat’s model number and date code readily available when contacting support; this information will help them quickly diagnose and resolve your issue.
The support team can guide you through troubleshooting steps, clarify wiring configurations, explain system test procedures, and address any operational questions you may have. They are equipped to handle a wide range of inquiries, ensuring a smooth and successful experience with your new thermostat. Don’t hesitate to reach out – Honeywell is committed to your satisfaction.
Finding the Model Number and Date Code
Locating your Honeywell FocusPro 6000 thermostat’s model number and date code is crucial when contacting customer support or ordering replacement parts. These identifiers provide essential information about your specific unit. To find this information, you will need to remove the thermostat from the wallplate.
Once removed, carefully inspect the back of the thermostat unit. The model number and date code are typically printed on a label affixed to the circuit board or the back casing. Record these numbers accurately, as they are vital for efficient assistance. Having this information prepared will expedite the support process and ensure you receive the correct guidance for your particular thermostat model.
Copyright Information (Honeywell International Inc.)
This Honeywell FocusPro 6000 Thermostat Installation Manual and the accompanying product are protected by copyright laws. Copyright 2011 Honeywell International Inc. All rights are expressly reserved. Reproduction, modification, distribution, or transmission of this manual, in whole or in part, by any means, is strictly prohibited without the prior written consent of Honeywell International Inc.
Honeywell retains all intellectual property rights, including patents, trademarks, and trade secrets, related to the thermostat’s design, functionality, and software. Any unauthorized use or duplication will be pursued to the full extent of the law. This copyright notice applies to all versions and translations of this document.