
roaster oven oster manual
Roaster Oven Oster Manual: A Comprehensive Guide
This manual‚ sourced from manualsbase (added August 22‚ 2020)‚ provides detailed instructions for Oster roaster ovens․ It’s a 17․0M resource‚
covering setup‚ operation‚ maintenance‚ and safety – essential for optimal performance․
Understanding Your Oster Roaster Oven
Your Oster roaster oven‚ as detailed in manualsbase resources (identified as manualsbase-id-652414 and added on 08/22/2020)‚ is a versatile kitchen appliance designed to simplify cooking‚ particularly for large gatherings or holiday meals․ Unlike a conventional oven‚ a roaster oven offers portability and supplemental oven space‚ freeing up your primary oven for other dishes․
These appliances excel at roasting meats‚ poultry‚ and baking‚ often providing more consistent and moist results due to their enclosed‚ self-basting design․ Understanding the core components – the roasting pan‚ heating element‚ temperature controls‚ and potentially a self-basting mechanism – is crucial for effective use․ The manual emphasizes familiarizing yourself with these features before initial operation․ Proper understanding ensures safe and efficient operation‚ maximizing the benefits of your Oster roaster oven․
This guide‚ sourced from online collections‚ aims to demystify the operation and maintenance of your specific model․
Key Features and Benefits
Oster roaster ovens‚ as documented in manualsbase (item size 17․0M‚ added 2020-08-22)‚ boast several key features enhancing cooking convenience․ A primary benefit is increased oven capacity‚ ideal for preparing large roasts or multiple dishes simultaneously – perfect for holidays! Portability is another significant advantage‚ allowing you to cook in locations without a traditional oven․
Many models include self-basting features‚ ensuring moist and flavorful results‚ particularly for poultry․ Precise temperature control allows for versatile cooking‚ from slow-cooking tender meats to baking delicate desserts․ The removable roasting pan simplifies cleaning‚ a crucial aspect of appliance maintenance․ These ovens offer consistent heating‚ reducing hot spots and promoting even cooking․
Ultimately‚ an Oster roaster oven provides a cost-effective and efficient solution for supplemental cooking‚ expanding your culinary possibilities․
Model Variations & Identifying Your Model
Oster offers a range of roaster oven models‚ varying in capacity‚ features‚ and design․ Information sourced from manualsbase (identified as manualsbase-id-652414‚ added 2020-08-22) indicates diverse options to suit different cooking needs․ Common variations include different size capacities – from smaller models ideal for families to larger ones for gatherings․
Features also differentiate models; some include digital controls‚ while others utilize traditional dials․ Self-basting options and specific temperature ranges can also vary․ Identifying your specific model is crucial for accessing the correct manual and troubleshooting information․ Locate the model number typically found on a sticker on the back or bottom of the oven․
Referencing this number when searching for manuals or contacting customer support ensures you receive accurate guidance tailored to your Oster roaster oven․

Setting Up Your Oster Roaster Oven
Before first use‚ carefully unpack your Oster roaster oven and remove all packaging materials․ As detailed in resources like manualsbase (added 2020-08-22‚ identifier manualsbase-id-652414)‚ ensure all components are present‚ including the roasting pan‚ rack‚ and any included accessories․ Place the oven on a stable‚ heat-resistant surface with adequate ventilation‚ away from flammable materials․

Familiarize yourself with the oven’s controls – temperature settings‚ timer‚ and any self-basting features․ Before plugging it in‚ inspect the power cord for damage․ Initial setup also involves washing the roasting pan and rack with warm‚ soapy water; Avoid abrasive cleaners that could damage the non-stick coating․
Proper setup is vital for safe and efficient operation․ Always consult your specific model’s manual for detailed instructions and safety precautions․
Initial Setup & Cleaning
As outlined in resources like manualsbase (identifier manualsbase-id-652414‚ added 2020-08-22)‚ the initial setup of your Oster roaster oven requires careful attention․ Begin by removing all packaging and inspecting for any shipping damage․ Wash the roasting pan and rack thoroughly with warm‚ soapy water before the first use․ Avoid harsh abrasives that could compromise the non-stick surface․
To eliminate any manufacturing residue‚ it’s recommended to run the oven empty for approximately 20-30 minutes at the lowest temperature setting․ This may produce a slight odor‚ which is normal and will dissipate․ Wipe down the interior and exterior surfaces with a damp cloth․
Regular cleaning after each use is crucial․ Allow the oven to cool completely before cleaning․ Proper initial setup and consistent cleaning contribute to longevity and optimal performance․
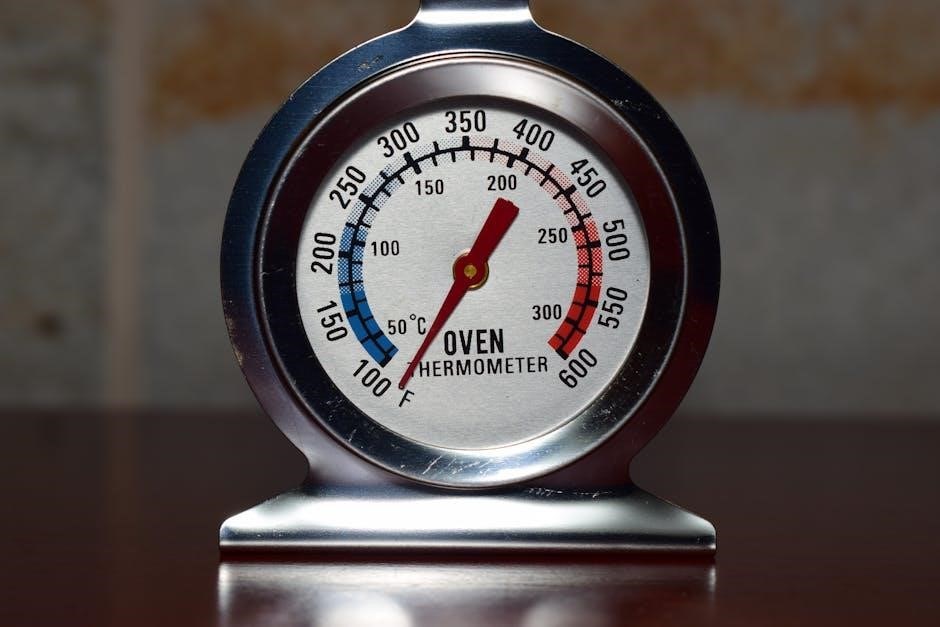
Temperature Control & Settings
Referencing resources like manualsbase (identified as manualsbase-id-652414‚ added on 2020-08-22)‚ understanding your Oster roaster oven’s temperature controls is vital․ Most models feature a dial or digital display allowing precise temperature selection‚ typically ranging from a warming setting (around 150°F) to a maximum of 450°F․
The manual emphasizes that accurate temperature is key to successful roasting and baking․ Begin with the recipe’s recommended temperature and adjust as needed․ Preheating is generally recommended for optimal results‚ allowing the oven to reach the desired temperature before adding food․
Be mindful of the oven’s recovery time after opening the lid‚ as temperature fluctuations can affect cooking times․ Consistent monitoring and adjustment ensure evenly cooked meals․ Always consult the specific model’s instructions for detailed guidance․
Using the Self-Basting Feature
Many Oster roaster ovens‚ as detailed in manuals sourced from manualsbase (added 2020-08-22‚ identifier manualsbase-id-652414)‚ incorporate a convenient self-basting feature․ This system typically involves a well within the roasting pan where liquids – broth‚ water‚ or melted butter – are added․
The oven’s design then automatically draws this liquid up and evenly distributes it over the roasting food‚ keeping it moist and flavorful throughout the cooking process․ This eliminates the need for manual basting‚ saving time and effort․
The manual stresses the importance of not overfilling the basting well‚ as this could lead to overflow․ Regularly check the liquid level during extended cooking times and replenish as needed; Utilizing this feature results in juicier‚ more tender results‚ particularly for poultry and larger cuts of meat․
Cooking with Your Oster Roaster Oven
Oster roaster oven manuals‚ available through resources like manualsbase (identified as manualsbase-id-652414‚ added August 22‚ 2020)‚ highlight the versatility of these appliances․ Beyond traditional roasting‚ they excel at baking‚ slow cooking‚ and warming․
Successful cooking relies on accurate temperature settings and understanding your specific model’s capabilities․ Preheating is crucial for consistent results‚ and the manual emphasizes using a meat thermometer to ensure food reaches a safe internal temperature․
The size of the roaster allows for cooking large portions‚ ideal for holiday gatherings or meal prepping․ Remember to adjust cooking times based on the weight of the food and desired level of doneness․ Proper pan preparation‚ such as greasing or lining with parchment paper‚ prevents sticking and simplifies cleanup․
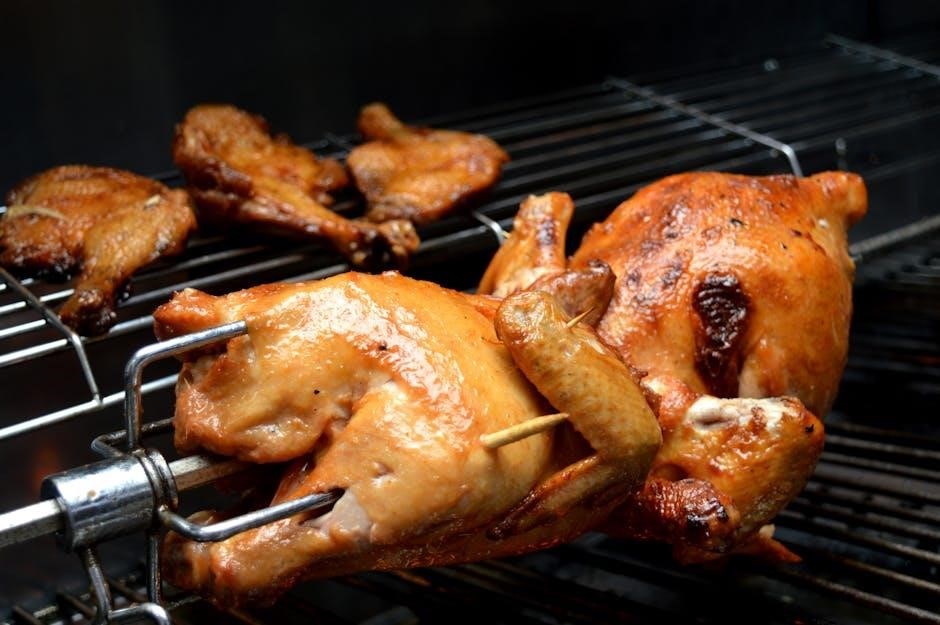
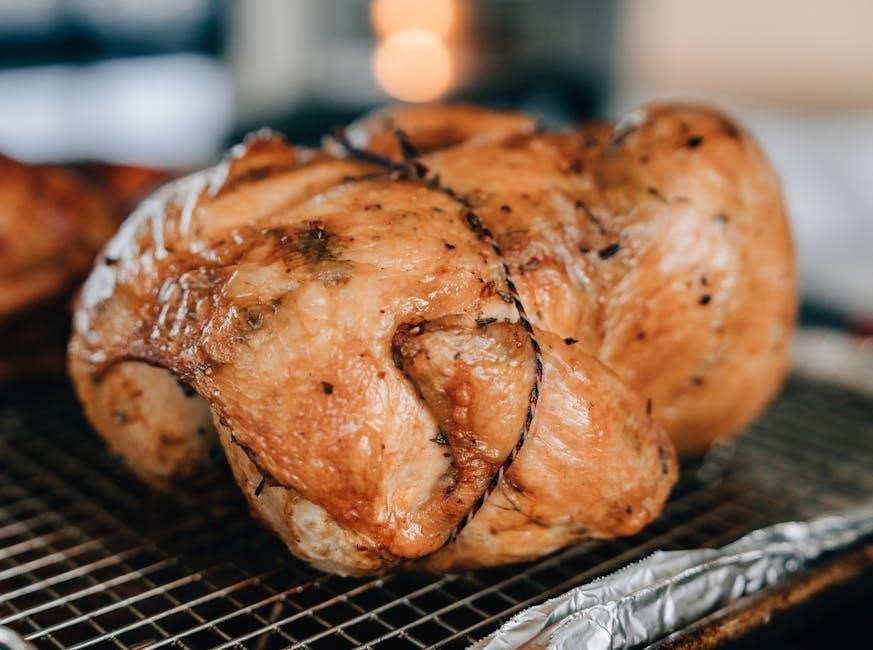
Roasting Poultry (Chicken‚ Turkey)
Oster roaster oven manuals‚ found on platforms like manualsbase (identified by manualsbase-id-652414‚ added 2020-08-22)‚ provide specific guidance for roasting poultry․ For optimal results‚ ensure the bird is fully thawed before roasting․ Patting the skin dry promotes crisping‚ while basting – utilizing the self-basting feature if available – keeps the meat moist․

Positioning the poultry on a roasting rack within the pan allows for even heat circulation․ Temperature recommendations vary based on the bird’s weight; consult the manual for precise guidelines․ Using a meat thermometer inserted into the thickest part of the thigh is essential to verify doneness‚ ensuring it reaches a safe internal temperature․
Resting the cooked poultry for 15-20 minutes before carving allows the juices to redistribute‚ resulting in a more tender and flavorful meal․
Roasting Meats (Beef‚ Pork‚ Lamb)
According to Oster roaster oven manuals available on resources like manualsbase (identified as manualsbase-id-652414‚ added August 22‚ 2020)‚ roasting meats requires careful attention to temperature and timing․ Sear the meat initially for enhanced flavor – this can be done directly in the roaster oven if it has a suitable searing function‚ or pre-sear in a skillet;
Position the meat on a roasting rack within the pan to promote even cooking․ The manual will detail specific temperature settings based on the cut and desired level of doneness (rare‚ medium‚ well-done)․ Basting with pan juices or a marinade helps maintain moisture and adds flavor․
Utilize a meat thermometer to accurately gauge internal temperature‚ ensuring the meat reaches a safe and palatable level․ Allowing the roasted meat to rest before carving is crucial for juice retention and tenderness․
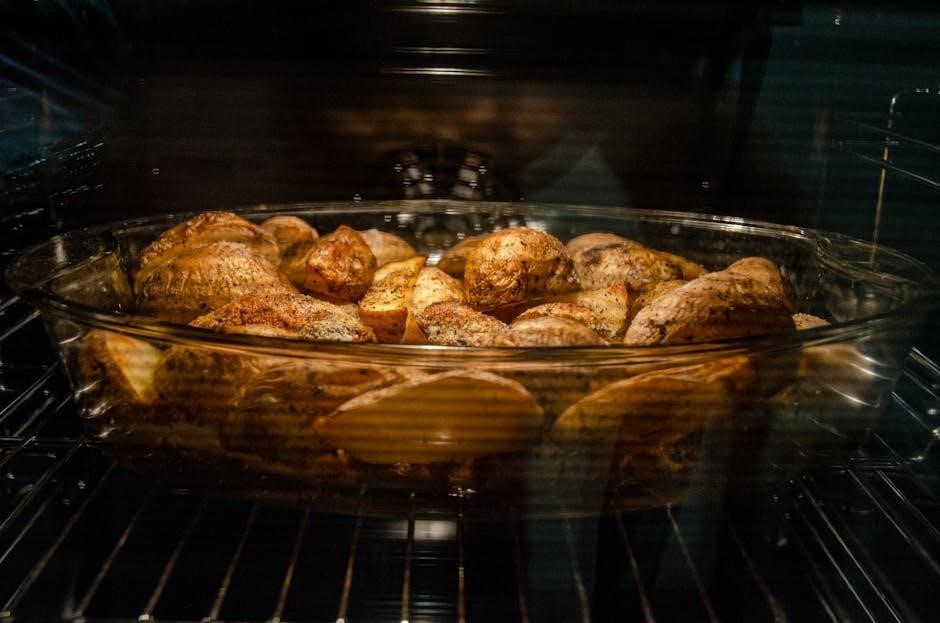
Baking in Your Roaster Oven
Oster roaster oven manuals‚ as found on platforms like manualsbase (identified by manualsbase-id-652414‚ added August 22‚ 2020)‚ confirm their versatility extends beyond roasting to baking․ Temperature adjustments are key; baking typically requires lower temperatures than roasting – consult the manual for specific settings․
Use standard baking pans that fit comfortably within the roaster oven’s interior․ Preheating is essential for consistent results‚ mirroring conventional oven practices․ Baking times may differ slightly from traditional oven recipes‚ so monitoring is advised․
The self-basting feature‚ while excellent for meats‚ isn’t generally needed for baking․ Ensure even heat distribution by rotating the baking pan halfway through the baking process․ Always check for doneness using appropriate methods (toothpick test‚ visual cues)․
Maintaining Your Oster Roaster Oven
According to Oster roaster oven manuals available online (sourced from manualsbase‚ added August 22‚ 2020‚ with identifier manualsbase-id-652414)‚ regular maintenance ensures longevity and optimal performance․ Consistent cleaning after each use is paramount‚ preventing food buildup and potential malfunctions․
Allow the roaster oven to cool completely before cleaning․ The roasting pan and any removable parts are typically dishwasher-safe‚ but check your specific model’s manual for confirmation․ For the interior‚ wipe down with a damp cloth and mild detergent; avoid abrasive cleaners․
Inspect the heating element periodically for any signs of damage or wear․ Proper storage‚ when not in use‚ is also crucial – keep it in a dry‚ safe place․ Refer to the manual for detailed care instructions and potential part replacement guidance․
Cleaning and Care Instructions
As detailed in Oster roaster oven manuals (identified as manualsbase-id-652414‚ added to manualsbase on August 22‚ 2020)‚ thorough cleaning is vital for maintaining your appliance․ Always disconnect the roaster oven from the power source before commencing any cleaning procedures․ Allow the unit to cool completely to prevent burns․
The roasting pan and rack are often dishwasher-safe; however‚ consult your specific model’s instructions․ The exterior surfaces can be wiped clean with a damp cloth and mild dish soap․ Avoid using abrasive cleaners‚ scouring pads‚ or harsh chemicals‚ as these can damage the finish․
For stubborn food residue‚ a paste of baking soda and water can be applied‚ left to sit‚ and then gently scrubbed․ Ensure all cleaning agents are thoroughly rinsed away before reassembling and using the roaster oven․ Proper care extends the lifespan of your appliance․
Troubleshooting Common Issues
Referencing Oster roaster oven documentation (manualsbase-id-652414‚ added August 22‚ 2020‚ to manualsbase)‚ several issues have common solutions․ If the oven isn’t heating‚ verify it’s properly plugged in and the temperature is set correctly․ A tripped circuit breaker should also be checked․
Uneven cooking can often be resolved by ensuring food isn’t overcrowded and is positioned centrally within the pan․ If the self-basting feature isn’t working‚ confirm the water reservoir is adequately filled and the unit is on a level surface․

For smoke during cooking‚ reduce the temperature or check for excessive fat buildup․ If problems persist‚ consult the full manual or seek qualified assistance․ Remember safety first – never attempt repairs yourself while the unit is powered on․
Replacing Parts (Heating Element‚ Pan)
According to resources like manualsbase (manualsbase-id-652414‚ added 2020-08-22)‚ replacing parts on your Oster roaster oven should only be undertaken with extreme caution and ideally by a qualified technician․ Attempting self-repair can void the warranty and pose safety risks․
A faulty heating element typically requires complete oven disassembly․ The pan‚ if damaged‚ can often be replaced independently‚ but ensure the new pan is a certified Oster replacement to maintain proper fit and function․ Always disconnect the oven from power before any part replacement․

Contact Oster customer support or authorized service centers for genuine replacement parts and detailed instructions․ Improperly installed parts can lead to malfunction or hazardous conditions․ Refer to the full manual for specific diagrams and safety guidelines․
Safety Precautions
As detailed in resources like manualsbase (identified as manualsbase-id-652414‚ added on August 22‚ 2020)‚ prioritizing safety when using your Oster roaster oven is paramount․ Always operate the oven on a stable‚ heat-resistant surface‚ away from flammable materials․ Never immerse the oven base‚ cord‚ or plug in water or other liquids․
Exercise extreme caution when handling hot surfaces‚ utilizing oven mitts or pot holders․ Avoid touching the heating element directly‚ even when cool‚ to prevent potential burns․ Ensure the oven is unplugged during cleaning and when not in use․ Supervise children closely when the oven is operating;
Do not operate the oven with a damaged cord or plug․ If the oven malfunctions‚ discontinue use immediately and contact Oster customer support for assistance․ Proper grounding is essential to prevent electrical shock․
Important Safety Guidelines
Drawing from resources like manualsbase (identified by manualsbase-id-652414‚ added August 22‚ 2020)‚ these guidelines are crucial for safe Oster roaster oven operation․ Always ensure adequate ventilation around the oven during use to prevent overheating․ Never leave the oven unattended while in operation‚ especially when self-basting․
Avoid using extension cords; plug directly into a grounded outlet․ If an extension cord is absolutely necessary‚ ensure it’s appropriately rated for the oven’s wattage․ Do not attempt to repair the oven yourself; contact qualified service personnel for any repairs․
Be mindful of hot steam when opening the lid or removing the roasting pan․ Allow the oven to cool completely before cleaning or storing․ Keep the oven clean to prevent grease buildup‚ which can be a fire hazard․ Follow all instructions outlined in the full manual for optimal safety․
Warranty Information & Registration
Information regarding your Oster roaster oven’s warranty‚ as detailed in accompanying documentation (sourced from manualsbase‚ added 2020-08-22)‚ is vital for protecting your investment․ Typically‚ Oster offers a limited warranty covering defects in materials and workmanship for a specified period – often one year from the date of purchase․
To validate your warranty‚ registration is frequently required․ This can often be completed online through the official Oster website‚ or by mailing in a registration card included with your appliance․ Retain your proof of purchase (receipt or invoice) as it will be necessary to submit a warranty claim․
The warranty does not cover damage resulting from misuse‚ accidents‚ or unauthorized repairs․ Refer to the complete warranty statement for full terms and conditions‚ and details on how to initiate a claim․ Manualsbase identifier: manualsbase-id-652414․
Finding Additional Resources & Support
Beyond this manual (identified as manualsbase-id-652414 and added to manualsbase on 2020-08-22)‚ Oster provides a wealth of support resources for your roaster oven․ The official Oster website is a primary source‚ offering frequently asked questions (FAQs)‚ downloadable manuals in various formats‚ and helpful cooking tips․
For direct assistance‚ Oster’s customer service team is available via phone‚ email‚ or online chat․ Their contact information can be found on the Oster website or in the documentation included with your appliance․ Online communities and forums dedicated to cooking and small appliances can also provide valuable insights and troubleshooting advice from fellow users․
Remember to have your model number readily available when contacting support‚ as this will help them provide accurate and specific assistance․ Explore these resources to maximize your roaster oven experience․